Greenboard - Microsoft Entra SSO Setup Instructions
Last updated: August 19, 2026
Step 1: Sign-In to the Microsoft Entra Admin Center
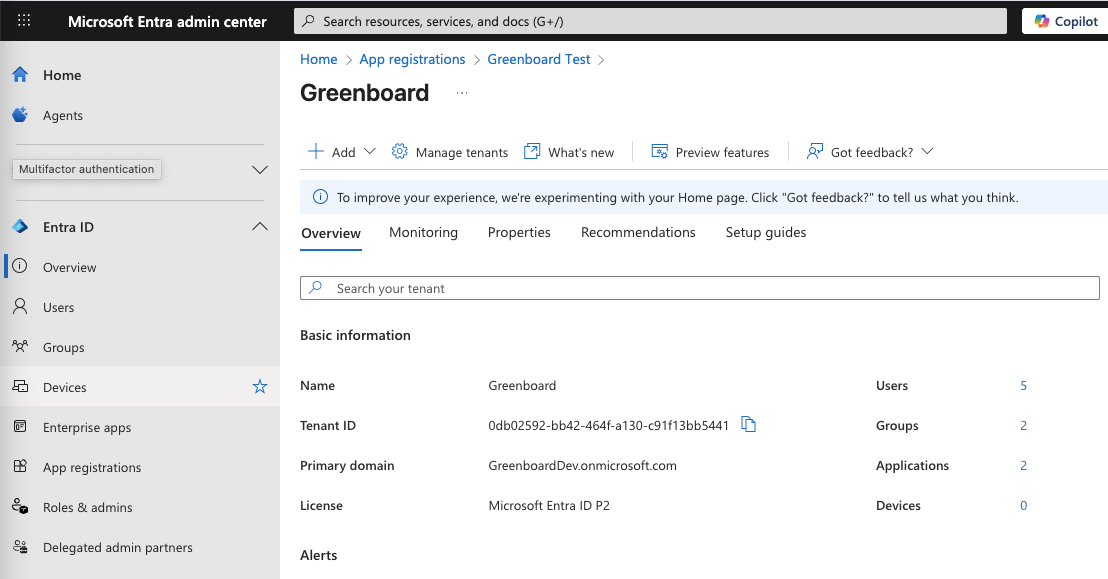
Step 2: Go to the "Azure Active Directory". In this view, take note of your 'Primary domain'
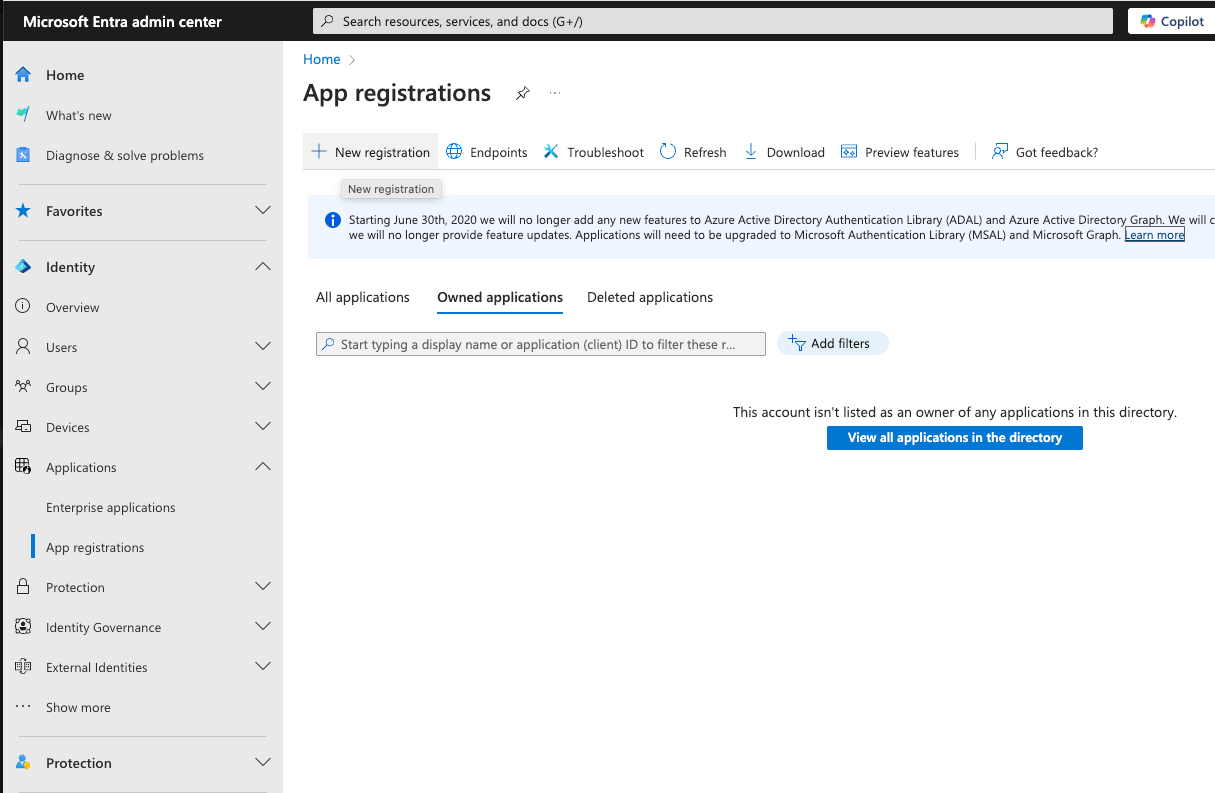
Step 3: Navigate to "Applications" -> "App registrations" -> "New registration".
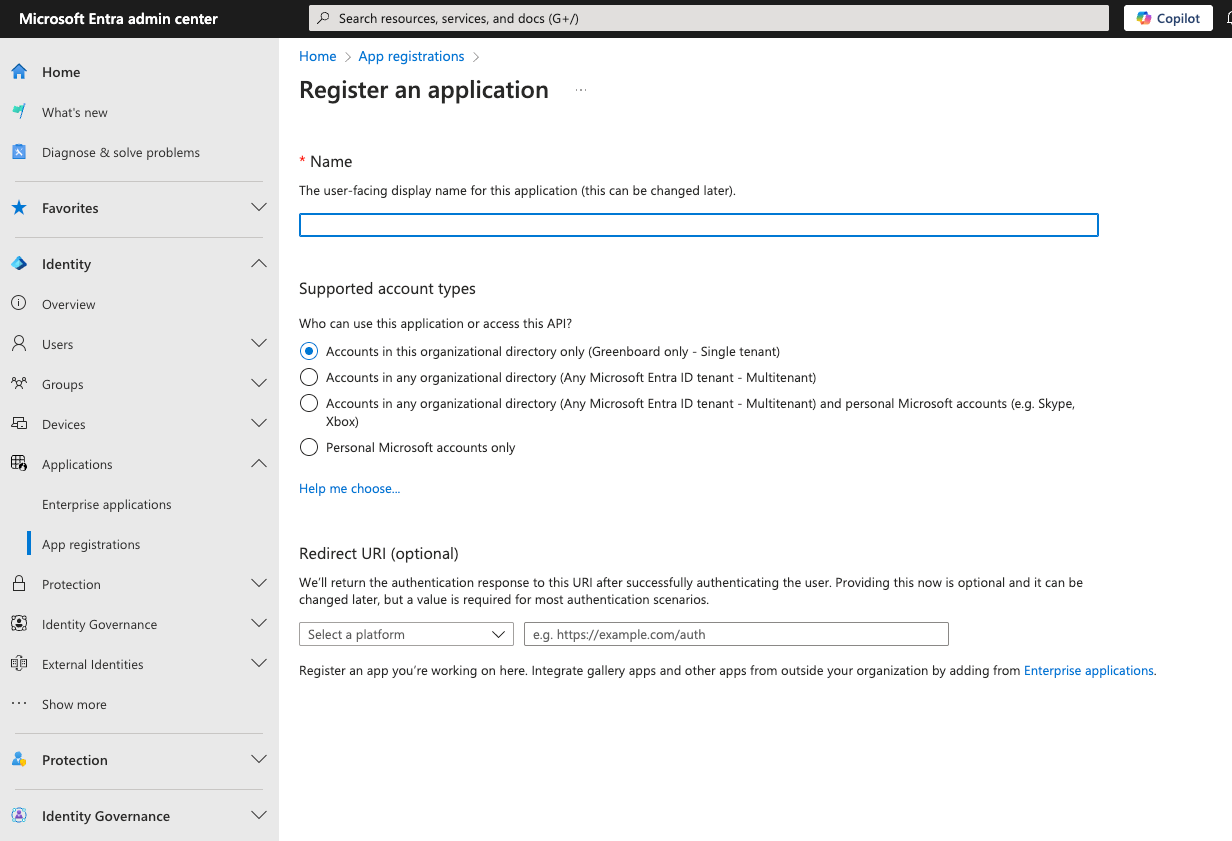
Step 4: Complete the new registration details
Name: Greenboard
Supported account types: Accounts in this organizational directory only (Greenboard only - Single tenant)
Redirect URI: https://auth.greenboard.io/login/callback
Click "Register"
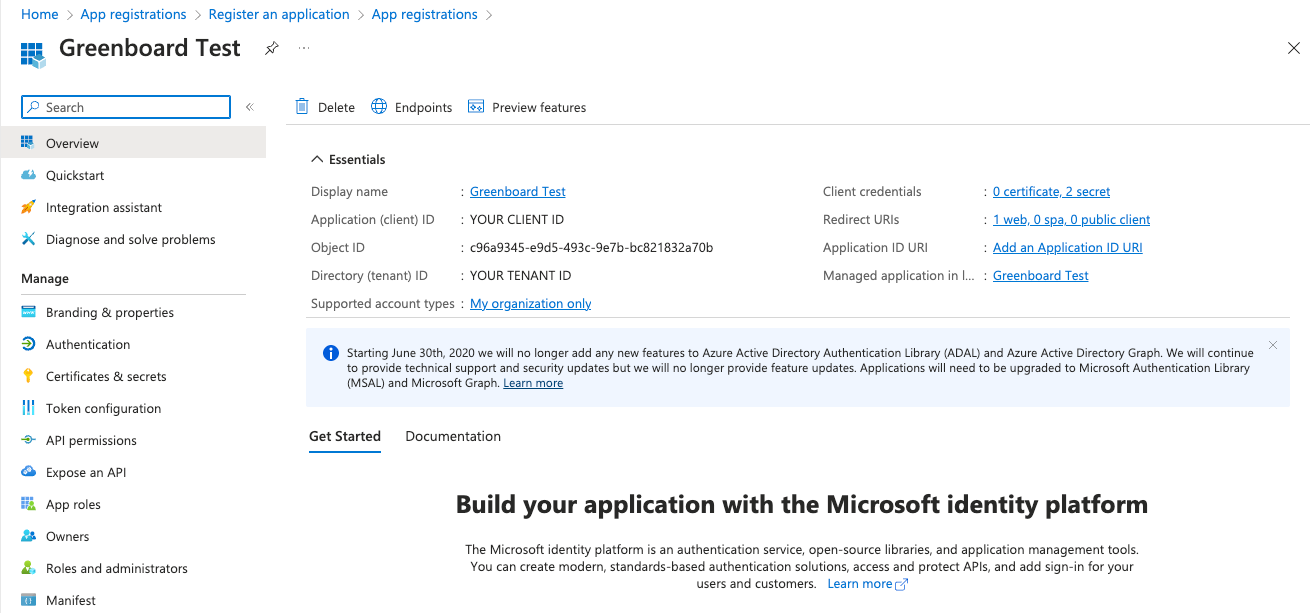
Step 5: Once directed to the new registration’s page, take note of the “Application (Client) Id” and the “Directory (tenant) Id”
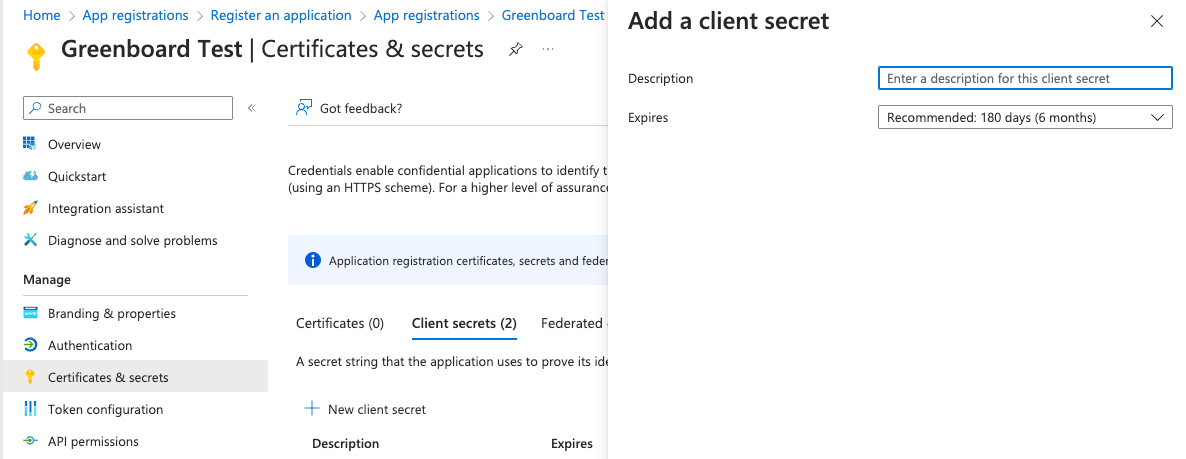
Step 6: Create a secret to be used in connect to Greenboard.
i. In the left panel, go to "Certificates & Secrets"
ii. Click "New Client Secret"
iii. Click "Add"
iv: Copy the Secret Value. NOTE: You must copy the Secret Value, Not the Secret Id.
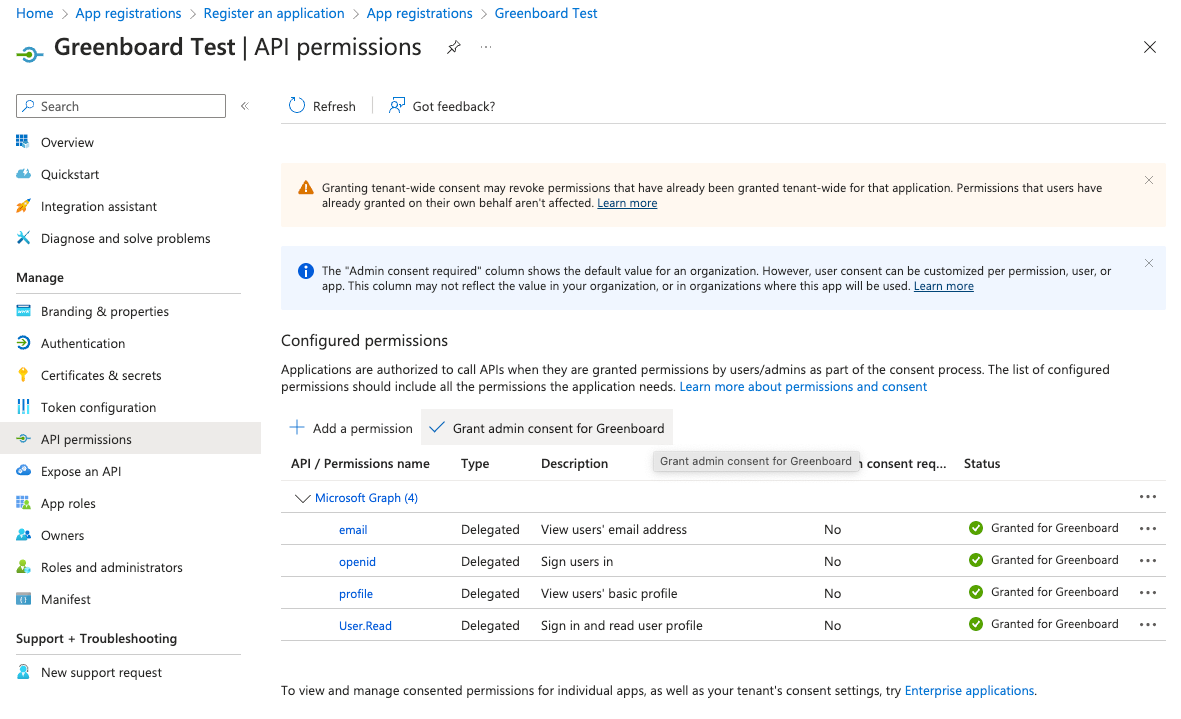
Step 7: Configure access levels for Greenboard access.
i. From the Application's page, click "API Permissions"
ii. Choose "Microsoft Graph"
iii. Select "Delegated permissions"
iv. Add these permissions:
openid
profile
User.Read
v. Click "Add permissions"
vi. Click "Grant admin consent"
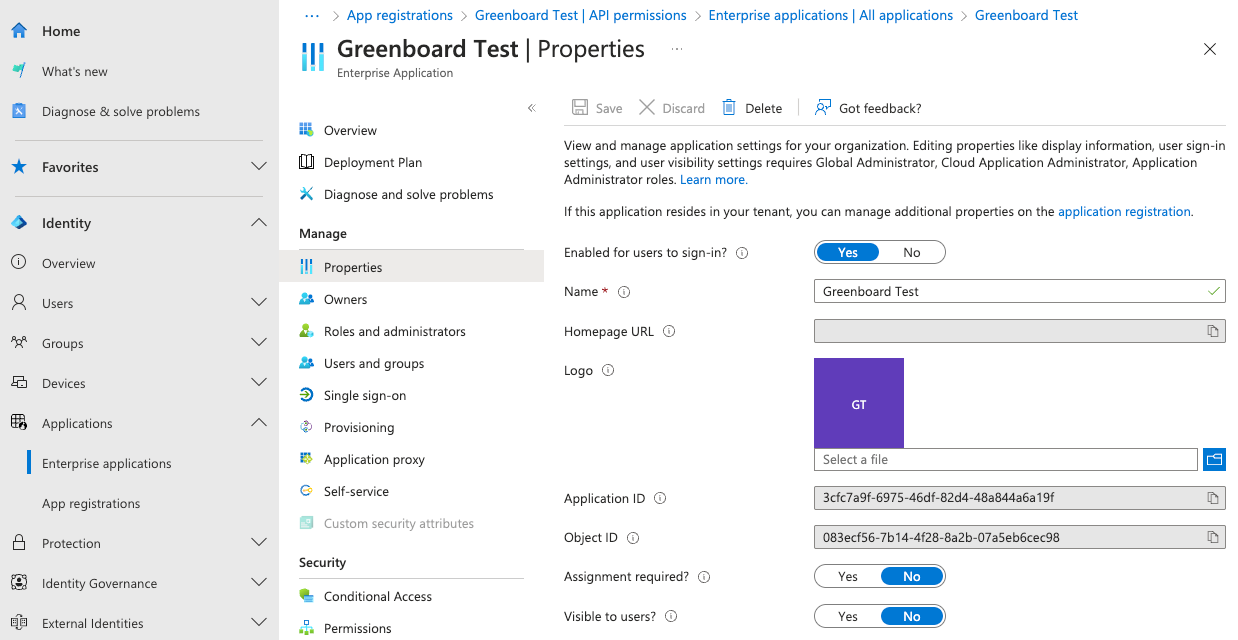
Step 8: Allow SSO Access
i. Go to "Enterprise applications" in the main menu
ii. Find your newly created application
iii. Under "Properties", ensure "Enabled for users to sign-in" is set to Yes
iv. Under "Users and groups", assign the users who should have access
Step 9: Provide Connection Details to Greenboard
i. Greenboard will provide a secure upload link where you can upload a document with the following information, from Steps 2-5 above:
Domain Name
Client ID
Client Secret
Tenant ID
Step 9: Confirm Access
i. Once details are transmitted, the Greenboard team will confirm connection
ii. You can now test the SSO connection
Tip: As a best practice, we recommend sharing any credentials with the Greenboard team using an encrypted or secure method where possible.